
| 일 | 월 | 화 | 수 | 목 | 금 | 토 |
|---|---|---|---|---|---|---|
| 1 | 2 | 3 | 4 | |||
| 5 | 6 | 7 | 8 | 9 | 10 | 11 |
| 12 | 13 | 14 | 15 | 16 | 17 | 18 |
| 19 | 20 | 21 | 22 | 23 | 24 | 25 |
| 26 | 27 | 28 | 29 | 30 |
- 오답노트
- 건대입구역
- zabbix
- 대전
- 러닝
- 정보처리기사
- Grafana
- 하체
- 자전거
- GitHub
- 소모임
- 중식
- 한강
- 대구
- 맛집
- DSEC
- 성수대교
- 유산소
- Shell
- 뚝섬유원지
- Linux
- 달리기
- 2021
- Run The Bridge
- Python
- docker
- Kubernetes
- 힐링
- 10km
- Podman
- Today
- Total
Run The Bridge
DevOps 3일차(GitLab, Jenkins) 본문
0. 들어가기 전에
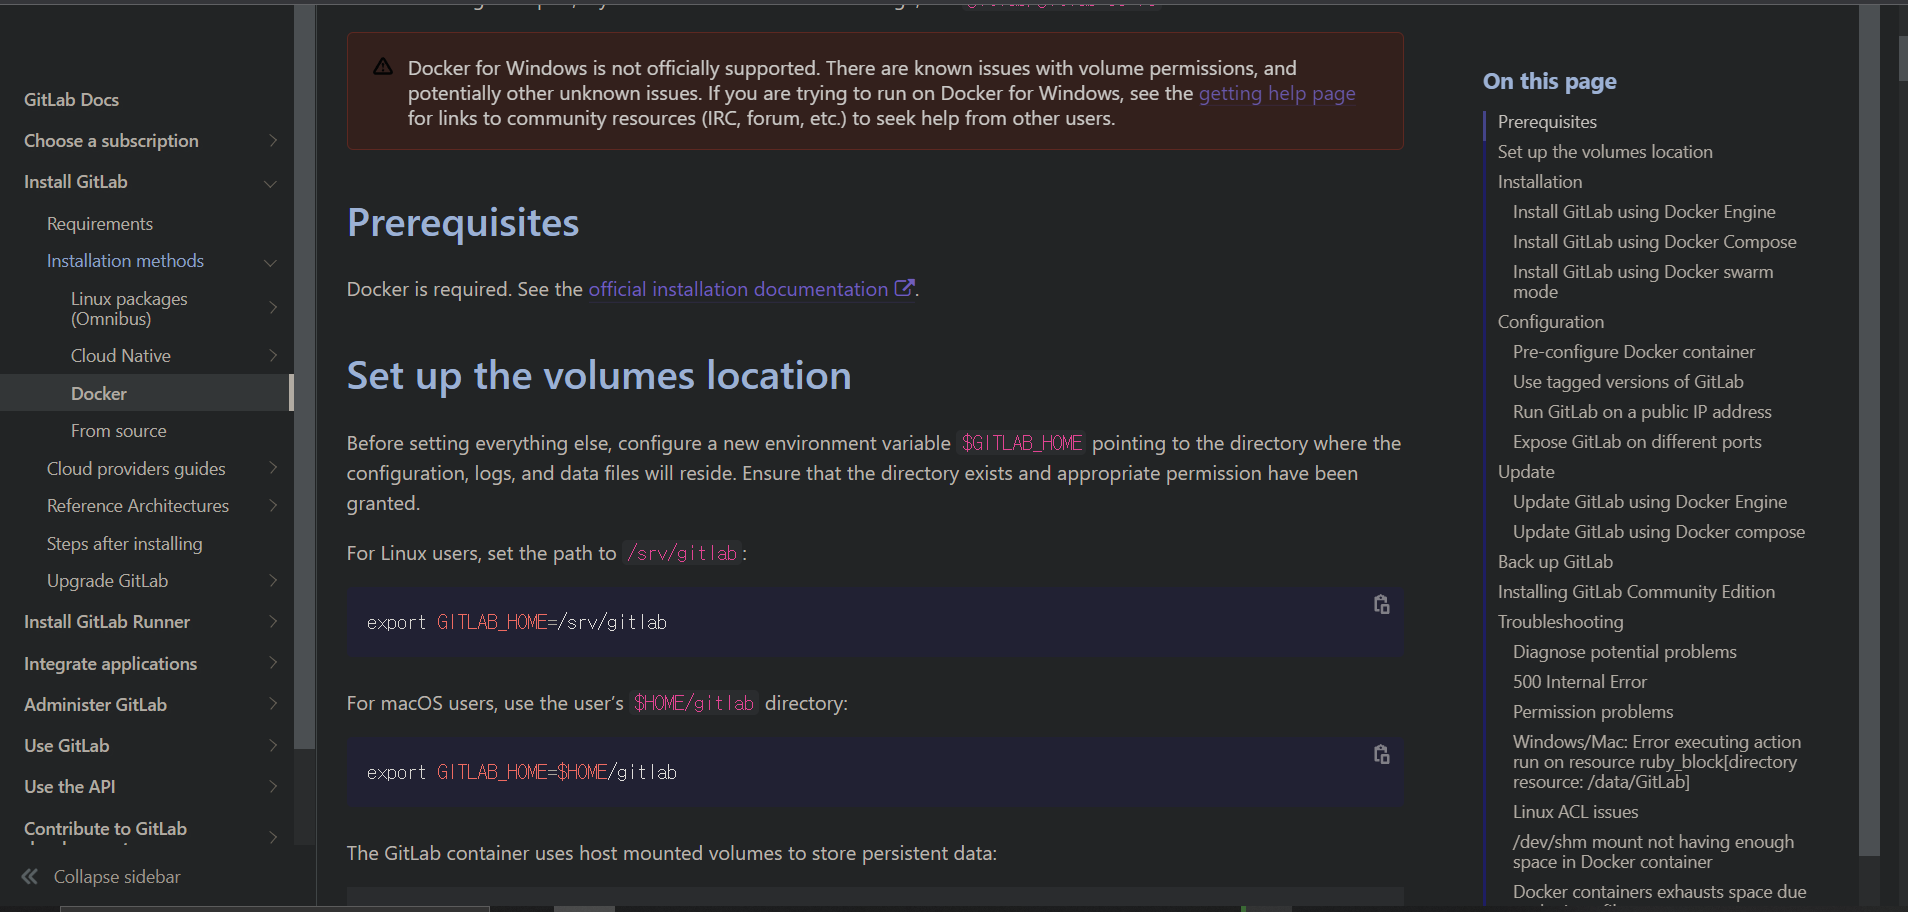
우리가 설치한 gitlab은 docker hub에서 찾으면 다음과 같다.
먼저 gitlab을 검색한다.

여러 가지 버전들이 존재하는데 우리가 사용한 버전은 바로 gitlab/gitlab-ce이다.


3번째에 Using GitLab Docker images를 들어가면 사용법을 볼 수 있다.

1. 예전에 쓴 ToyProject를 GitLab 저장소에 저장
먼저 GitLab에서 Project를 먼저 생성해야 한다.

그다음 'Create blank project'를 클릭

마지막에 README는 체크를 해제한다. 각 프로젝트 이름은 'api1', 'api2', 'main'으로 지정한다.(임의설정)

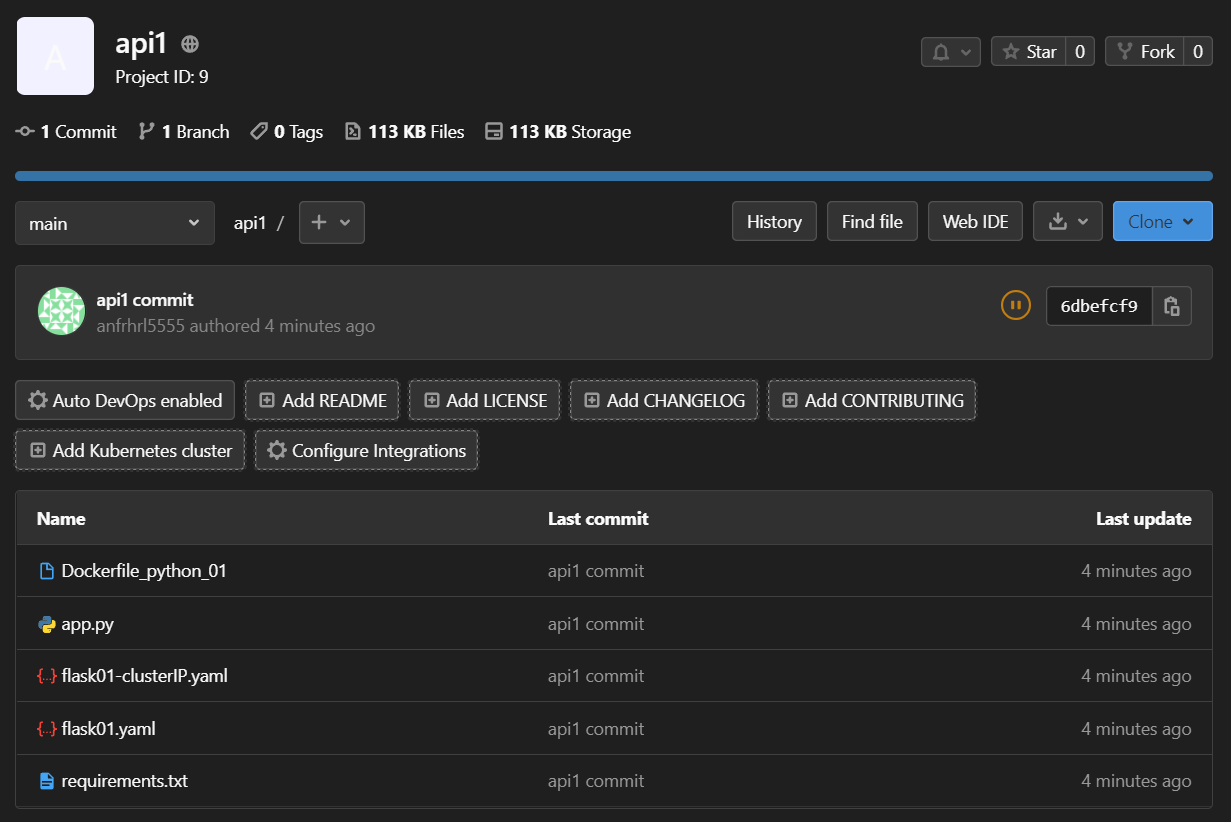
생성된 모습을 볼 수 있다.

1. 이제 toyproject가 있는 디렉터리로 가서 git으로 관리시키게 만들어야 한다.
git init # 이 폴더를 git으로 관리하겠다.
2. 그다음 remote를 해줘야 하는데, remote는 project를 클릭하면 이렇게 입력하라고 잘 나와있다.
git remote add api1 http://192.168.100.141:30080/anfrhrl5555/api1.git # api1은 이름을 바꿔도된다.

3. git status로 상태를 한 번 봐준다. 아직 add와 commit를 하지 않아서 색깔이 빨간색이다.

4. add를 하면 색이 초록색으로 바뀐다
git add . # 모든 파일을 add 하겠다.
5. commit를 하고 commit message를 남겨준다.
git commit -m "당신의 메시지"
6. branch 이름을 바꿔준다.
git branch -M main
7. 마지막으로 push 해주면 된다.
git push -u api1 main # remote이름 + branch이름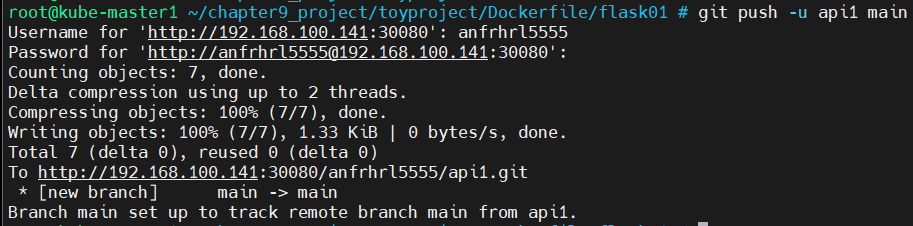
8. GitLab에 잘 올라온 모습(나머지 api2, main도 똑같은 방식으로 진행하면 된다.)
※ GitLab에서 Token 발급받는 법

Token Name, 만료일, 허용할 권한을 설정하고 Token을 발급받으면 된다.
(토큰은 최초 1회만 보여주기 때문에 꼭 어딘가에 저장해놔야 함!!)

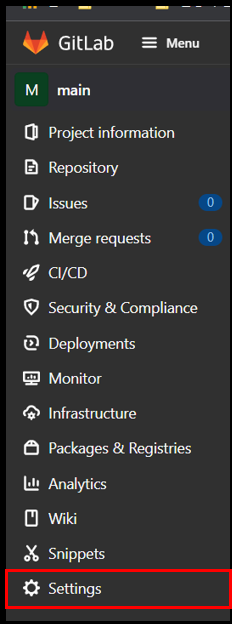
2. CI/CD 구성
아래의 과정을 자동화합니다.
===소스 코드 작성부터
- source code 작성(쉘, 개발도구 등)
- source code 저장소에 저장(github, gitlab 등)
- git add
- git commit
- git 실습 - docker image 생성
- Dockerfile, docker build - docker image 저장(push, private, docker registry)
- docker push - k8s에 배포(deployment, service)
- kubectl apply deployment, service
===k8s에 배포해서 서비스가 운영되는 상태까지

jenkins 자동화 툴을 설치하여 CI/CD 환경 구축
- jenkins는 github를 통해 통합된 소스를 가져오고(source checkout)
- source build 및 docker build를 한 뒤 docker 이미지를 생성
- 생성된 이미지는 docker registry에 push
- jenkins는 docker 또는 kubernetes에 deployment에 이미지 업데이트 요청
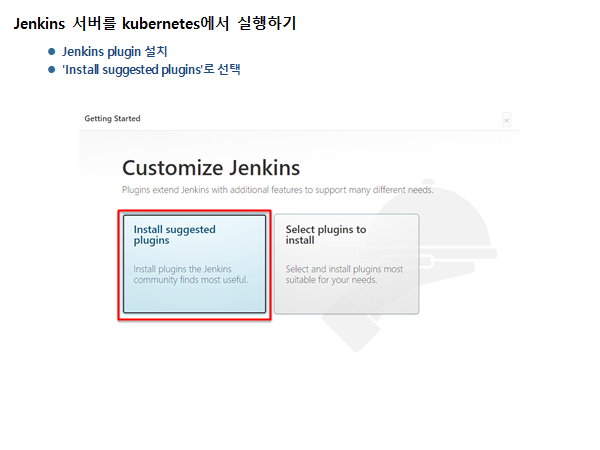
이제 본격적으로 Jenkins 서버를 구성해본다.
Jenkins는 k8s와 docker 둘 다 올릴 수 있는데 먼저 docker로 올리는 법을 소개하면 다음과 같다.
docker run -p 8080:8080 -p 50000:50000 -v /root/jenkins_home:/var/jenkins_home jenkins/jenkins:lts-jdk11
위의 명령을 참고하고 쿠버 네티스로 올려본다.
1. jenkins.yaml 파일은 다음과 같다.
# jenkins.yaml
apiVersion: apps/v1
kind: Deployment
metadata:
  namespace: cicd
  name: jenkins  # service에서 지정할 이름을 지정한다.
  labels:
    app: jenkins
spec:
  replicas: 1
  selector:
    matchLabels:
      app: jenkins  # 아래 template에 지정한 이름과 같아야 한다.
  template:
    metadata:
      name: jenkins  # 임의 지정
      labels:
        app: jenkins
    spec:
      containers:
      - name: jenkins  # 임의 지정
        image: jenkins/jenkins:lts-jdk11  # 사용할 image
        volumeMounts:
        - name: jenkins
          mountPath: /var/jenkins_home
        ports:
          - containerPort: 8080
          - containerPort: 50000

      volumes:
      - name: jenkins  # volumeMounts와 이름이 똑같아야 한다.
        persistentVolumeClaim:
          claimName: jenkins-pvc
2. volume.yaml파일은 다음과 같다.
# volume.yaml
apiVersion: v1
kind: PersistentVolume
metadata:
  name: jenkins-pv
spec:
  capacity:
    storage: 10Gi
  accessModes:
    - ReadWriteMany
  nfs:
    server: 192.168.100.140
    path: /nfs/jenkins
---
apiVersion: v1
kind: PersistentVolumeClaim
metadata:
  name: jenkins-pvc
  namespace: cicd
spec:
  accessModes:
    - ReadWriteMany
  resources:
    requests:
      storage: 10Gi
  volumeName: jenkins-pv
3. service.yaml 파일은 다음과 같다
# service.yaml
apiVersion: v1
kind: Service
metadata:
  name: jenkins-service
  namespace: cicd
spec:
  type: NodePort
  ports:
  - name: jenkins-service
    port: 8080
    targetPort: 8080
    nodePort: 31000
  selector:
    app: jenkins
volume - service - jenkins 순서로 올려준다.
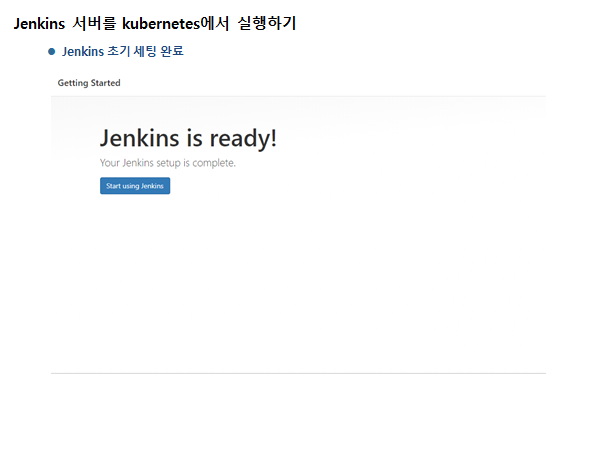
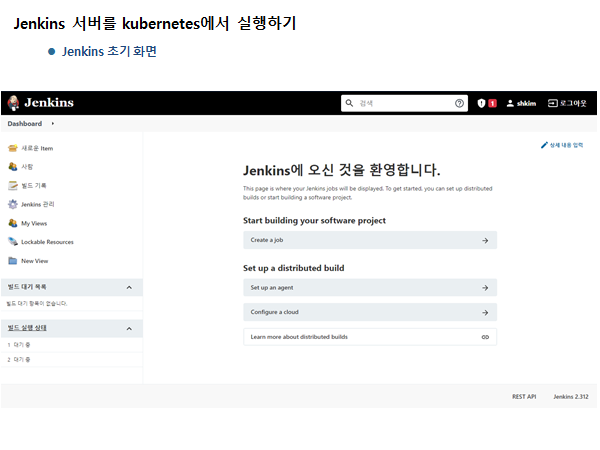
4. 설치가 완료된 모습(설치 과정 및 기타 설정은 skip 하였습니다.)

※ Jenkins 설치 중, 빨간색으로 'X'표시가 떠서 진행이 안될 시, VM 전체를 reboot 하고 재설치를 권장합니다.
5. PPT자료


3. Jenkin의 본격적인 설정
- github 또는 kubernetes에 접속하여 인증받기 위한 credentials 생성
- docker build와 kubernetes에 배포하기 위해 필요한 플러그인 설치
- jenkinsfile 작성
- Jenkins Pipeline 프로젝트 생성
1. 먼저 Credentials를 생성하자.


토큰을 사용하는 Secret text를 선택해준다.
그리고 Secret에서는 GitLab에서 사용자 계정에 대한 Token을 생성하고 넣어준다.(위에 나와있음)


2. 이제 플러그인 설치해준다.
두 번째 tab에서 docker라고 입력해준다.


docker Pipline을 설치한다.

3. 이제 Item을 만든다.


gitlab에서 main에 있는 clone 주소를 복사한다.
그다음 pipeline OK 누른 곳에서 밑으로 내려가면 설정하는 부분이 나온다. SCM으로 설정 후 git 선택 아까 복사한 URL을 입력해준다.

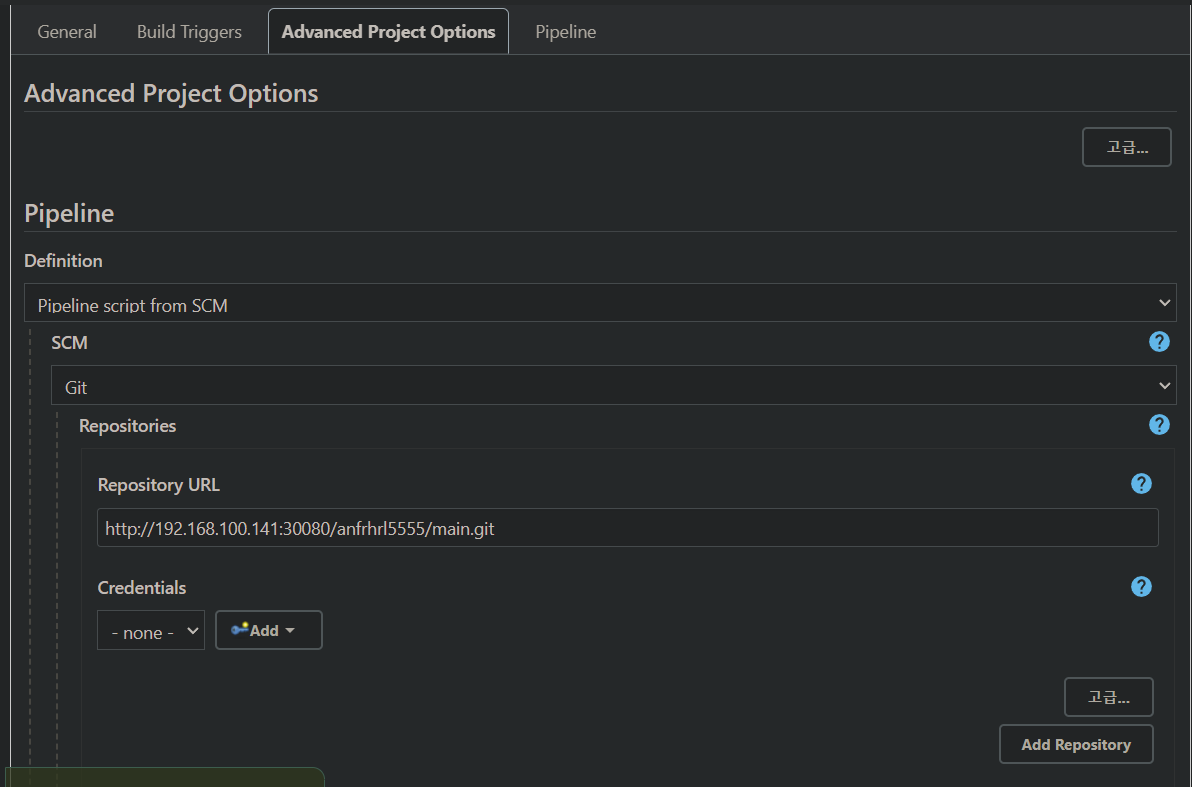

그리고 우리는 아까 branch을 main으로 바꿨기 때문에 변경시켜주고 저장! 눌러준다.
생성 완료!

4. 이제 JenkinsFile 작성한다.
아까 GitLab에 main 디렉터리를 썼기 때문에, VM에서 해당 디렉터리로 이동 후 다음을 따른다.
vi Jenkinsfile  # 이름 똑같아야한다.

pipeline {
    agent any

    stages {
        stage('Build and Push Docker Image...') {
            steps {
                script {
                  // CUSTOM REGISTRY
                    docker.withRegistry('https://myregistry.images.io:30000') {

                        /* Build the container image */
                        def dockerImage = docker.build("my-image:${env.BUILD_ID}")

                        /* Push the container to the custom Registry */
                        dockerImage.push()

                    }
               }
            }
        }
    }
}
위의 내용을 넣고, 저장한다.

그다음은 GitLab으로 Jenkinsfile을 add, commit, push를 해준다.

그리고 다시 Jenkins로 와서 Build Now를 진행한다. 그리고 오류가 난다.


'docker not found'라고 나온다.
즉, jenkins pod위에 docker라는 명령을 사용할 수 없는 상태이다.
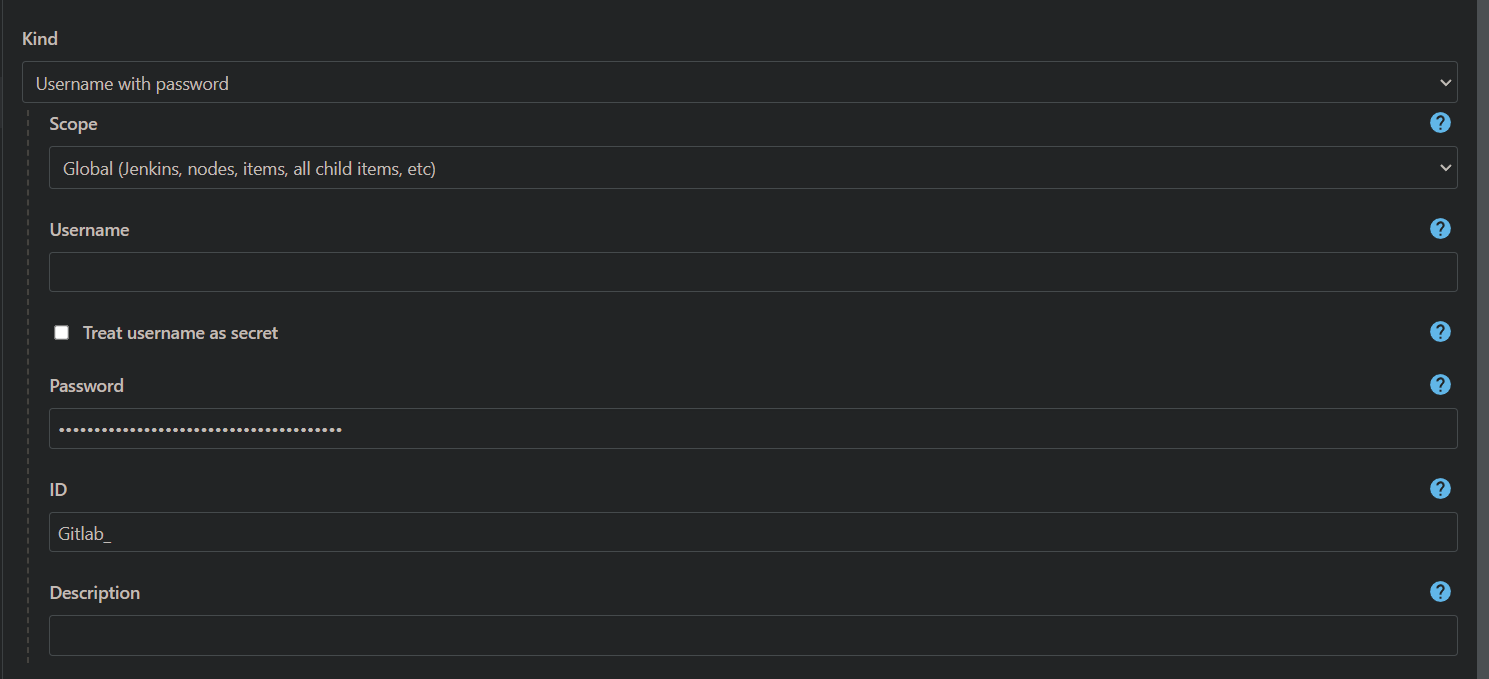
사실 처음부터 잘못되어 있어서 Credential부터 다시 만들어 주어야 한다. 위에서는 Secret Key를 사용했지만 'Username with password'을 선택해야 한다.
Password에서는 계정에 발급받은 Token값을 넣어주면 된다.
그리고 Gitlab에 Repository를 Private으로 바꿔준다.

이제 Credential를 새로 만들었으니, Pipeline을 설정해야 한다.
Pipeline은 크게 차이가 없다.

그리고 Jenkinsfile도 수정해주어야 한다. 그 후 git 명령을 사용한다.
# Jenkinsfile
pipeline {
    agent any

    stages {
        stage('Build and Push Docker Image...') {
            steps {
                script {
                  // CUSTOM REGISTRY
                    docker.withRegistry('https://myregistry.images.io:30000') {

                        /* Build the container image */
                        def dockerImage = docker.build("main:${env.BUILD_ID}")

                        /* Push the container to the custom Registry */
                        dockerImage.push()

                    }
                    /* Remove docker image*/
                    sh "docker rmi -f main:${env.BUILD_ID}"
                }
            }
        }
    }
}
git add.
git commit -m "당신의 메시지"
git push -u origin main # gitLab의 remote, branch명
아직 buildnow를 해도 build가 되지 않는다. docker를 사용할 수 있게 해야 한다
Jenkins 컨테이너에서 docker 명령어를 실행할 수 있게 하려면...
- Jenkins 컨테이너 안에서 docker 명령어를 설치 (Docker in Docker → DinD)
- Jenkins 이미지에서 docker를 설치하고 새로운 Jenkins 이미지를 사용
- 로컬(노드)의 /usr/bin/docker 명령어를 컨테이너로 볼륨 마운트(Docker out of Docker → Dood)
which docker # docker가 어디 명령을 참조하는지 알 수 있다
apiVersion: apps/v1
kind: Deployment
metadata:
  namespace: cicd
  name: jenkins
  labels:
    app: jenkins
spec:
  replicas: 1
  selector:
    matchLabels:
      app: jenkins
  template:
    metadata:
      name: jenkins
      labels:
        app: jenkins
    spec:
      containers:
      - name: jenkins
        image: jenkins/jenkins:lts-jdk11
        volumeMounts:
        - name: jenkins
          mountPath: /var/jenkins_home  # mount 지점
        - name: docker-socket
          mountPath: /var/run/docker.sock
        - name: docker-bin
          mountPath: /usr/bin/docker  # mount 지점
        - name: kubectl-bin
          mountPath: /usr/bin/kubectl  # mount 지점
        ports:
          - containerPort: 8080
          - containerPort: 50000

      volumes:
      - name: jenkins
        persistentVolumeClaim:
          claimName: jenkins-pvc
      - name: docker-socket
        hostPath:
          path: /var/run/docker.sock  # docker socker 연결
          type: Socket  # type은 Socket
      - name: docker-bin
        hostPath:
          path: /usr/bin/docker  # which로 확인한 docker 명령어 경로
          type: File  # type은 File
      - name: kubectl-bin
        hostPath:
          path: /usr/bin/kubectl  # which로 확인한 kubectl 명령어 경로
          type: File
docker 명령이 잘 먹는 것을 볼 수 있다.
(Permission denied 오류가 뜨면 master와 worker node에 /var/run/docker.sock의 실행 권한을 추가해주면 된다)

/var/run/docker.sock에 권한이 666으로 바뀌었다.
그 후 buildnow를 하면 성공한 모습을 볼 수 있다.

4. kubernetes에 배포하기
Jenkins의 plguin 중에서 Kubernets Cli를 설치해준다.

kubernetes 클러스터에서 token 생성 → 권한이 제한된 serviceaccount가 필요
- 앱이 배포될 네임스페이스에 jenkins를 위한 serviceaccount 생성
- 생성한 serviceaccount에 role과 rolebinding을 적용(해당 네임스페이스만 사용하도록)
kubectl create ns toyproject # toyproject namespace를 생성한다.
이제 jenkins 관련 yaml을 올려준다.
# jenkins-sa.yaml
apiVersion: v1
kind: ServiceAccount
metadata:
  name: jenkins
  namespace: toyproject
# vi jenkins-role.yaml
apiVersion: rbac.authorization.k8s.io/v1
kind: Role
metadata:
namespace: toyproject
name: jenkins-role
rules:
- apiGroups: ["*"]
resources: ["*"]
verbs: ["*"]# jenkins-rolebinding.yaml
apiVersion: rbac.authorization.k8s.io/v1
kind: RoleBinding
metadata:
name: jenkins-rolebinding
namespace: toyproject
subjects:
- kind: ServiceAccount
name: jenkins
namespace: toyproject
roleRef:
kind: Role
name: jenkins-role
apiGroup: rbac.authorization.k8s.io
role파일을 만들면 자동적으로 secret파일이 만들어진다.

여기서 jeknins-token-5ghn6을 잘 알아둬야 한다. 다음 명령으로 바로 확인할 수 있다.
kubectl get sa -n toyproject jenkins -o jsonpath='{.secrets[0].name}{"\n"}'kubectl get secret -n toyproject [jenkins secret name] -o jsonpath='{.data.token}' | base64 -d
kubernetes token을 이용한 Credentials를 생성해준다.


이제 Jenkinsfile에 kubernetes 관련 stages를 넣어준다.
# Jenkinsfile
pipeline {
    agent any

    stages {
        stage('Build and Push Docker Image...') {
            steps {
                script {
                  // CUSTOM REGISTRY
                    docker.withRegistry('https://myregistry.images.io:30000') {

                        /* Build the container image */
                        def dockerImage = docker.build("main:${env.BUILD_ID}")

                        /* Push the container to the custom Registry */
                        dockerImage.push()

                    }
                    /* Remove docker image*/
                    sh "docker rmi -f main:${env.BUILD_ID}"
                }
            }
        }
        stage('Deploy to Kubernetes...') {
            steps {
                script {
                    withKubeConfig([credentialsId: 'mykubetoken', serverUrl: 'https://10.96.0.1']) {
                        sh """
                           kubectl patch deployment main -n toyproject -p'{"spec":{"template":{"spec":{"containers":[{"name":"python","image":"myregistry.images.io:30000/main:${env.BUILD_ID}"}]}}}}'
                           """
                    }
                }
            }
        }
    }
}
git add .
git commit -m "당신의 메시지"
git push -u origin main # remote명 + branch명
이렇게 하고 buidlnow를 하면 원래는 kubectl not found 오류가 뜬다.
하지만 우리는 docker의 명령을 추가하면서 kubectl 명령어까지 추가했기 때문에 오류가 나지 않는다.
이제는 deployment error가 나온다.

그래서 최초로 먼저 배포된 deployment가 존재해야 하므로, 만들어준다! (사실은 껍데기라고 보면 된다.)
# deployment.yaml
apiVersion: apps/v1
kind: Deployment
metadata:
  name: main
  namespace: toyproject
spec:
  replicas: 1
  selector:
    matchLabels:
      app: main
  template:
    metadata:
      name: main
      labels:
        app: main
    spec:
      containers:
      - name: nginx
        image: nginx
        imagePullPolicy: Always
        ports:
        - containerPort: 8000
          protocol: TCP
# service-main.yaml
apiVersion: v1
kind: Service
metadata:
name: main
namespace: toyproject
spec:
ports:
- name: port
port: 8000
targetPort: 8000
selector:
app: main
type: NodePort
이제 다시 build now를 해주면 성공한 모습을 볼 수 있다.

'Cloud > DevOps' 카테고리의 다른 글
| DevOps 1일차(git) (0) | 2021.10.02 |
|---|---|
| DevOps 2일차(git, gitlab) (0) | 2021.09.27 |

