
| 일 | 월 | 화 | 수 | 목 | 금 | 토 |
|---|---|---|---|---|---|---|
| 1 | 2 | 3 | ||||
| 4 | 5 | 6 | 7 | 8 | 9 | 10 |
| 11 | 12 | 13 | 14 | 15 | 16 | 17 |
| 18 | 19 | 20 | 21 | 22 | 23 | 24 |
| 25 | 26 | 27 | 28 | 29 | 30 | 31 |
- 하체
- Shell
- docker
- 성수대교
- zabbix
- 대구
- 정보처리기사
- 달리기
- 10km
- GitHub
- 건대입구역
- 뚝섬유원지
- 한강
- 대전
- 2021
- 중식
- Podman
- 힐링
- 자전거
- Python
- Run The Bridge
- 오답노트
- 러닝
- Kubernetes
- DSEC
- Grafana
- 맛집
- 소모임
- Linux
- 유산소
- Today
- Total
Run The Bridge
사이드카 컨테이너 restart 테스트 본문
0. 들어가기에 앞서
쿠버네티스상에서 한 Pod안에 두 개의 앱이 들어가면 사이드카라고 부르는데, 통상적으로 하나의 앱은 로그를 관리하거나 healthcheck를 하는 데 사용하는 걸로 알고 있다.
쿠버네티스의 원칙은 1개의 Pod에는 1개의 앱만 올라가는 것을 원칙으로 삼고 있다.
여기까지 간단하게 서론 이야기를 하고, 만약 사이드카로 구성된 컨테이너 중 하나의 앱이 오류가 나서 올라오지 않을 때, 전체 Pod를 재시작할까? 아니면 오류난 앱만 재시작할까? 한 번 테스트해본다.
1. 사이드카 앱 구성하기

kubernetes docs에서 지원하는 사이드카 컨테이너 yaml을 사용한다.
apiVersion: v1
kind: Pod
metadata:
  name: counter
spec:
  containers:
  - name: count
    image: busybox
    args:
    - /bin/sh
    - -c
    - >
      i=0;
      while true;
      do
        echo "$i: $(date)" >> /var/log/1.log;
        echo "$(date) INFO $i" >> /var/log/2.log;
        i=$((i+1));
        sleep 1;
      done
    volumeMounts:
    - name: varlog
      mountPath: /var/log
  - name: count-log-1
    image: busybox
    args: [/bin/sh, -c, 'tail -n+1 -f /var/log/1.log']
    volumeMounts:
    - name: varlog
      mountPath: /var/log
  - name: count-log-2
    image: busybox
    args: [/bin/sh, -c, 'tail -n+1 -f /var/log/2.log']
    volumeMounts:
    - name: varlog
      mountPath: /var/log
  volumes:
  - name: varlog
    emptyDir: {}
날짜에 대한 로그를 1.log 파일에 담고 두 번째는 INFO 정보까지 담아서 2.log 파일에 담는다.
그리고 사이드카 컨테이너를 생성해서 해당 로그를 tail로 읽는 간단한 컨테이너이다.
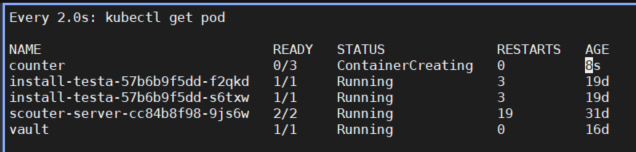
잠깐 기다리면 counter라는 pod가 3/3으로 올라온다.
kubectl create -f sidecar.yaml
---
kubectl get pod
NAME                             READY   STATUS              RESTARTS   AGE
counter                          0/3     ContainerCreating   0          1s
---
kubectl get pod
NAME                             READY   STATUS    RESTARTS   AGE
counter                          3/3     Running   0          22s
2. sidecar image에 probe 설정
probe설정은 Liveness probe와 Readiness probe가 존재한다.(추가로 startupProbe도 존재한다.)
Liveness probe는 컨테이너의 동작 여부를 나타낸다. 만약 liveness probe가 실패하면, kubelet은 컨테이너를 죽이고 해당 컨테이너를 재시작시킨다.
반대로 Readiness probe는 컨테이너가 요청을 처리할 준비가 되었는지 여부를 나타낸다. 쉽게 설명하자면 컨테이너가 올라오고, APP이 정상적으로 뜰 때까지의 시간이라고 보면 된다. mysql 같은 app을 올리면 바로 올라오는지 않고, 조금 기다려야 동작하는 것처럼 이해하면 된다.
현재 우리가 사용해야 할 것은 Liveness probe라고 보면 된다.
probe설정은 다음과 같이 존재한다.
- initialDelaySeconds: 컨테이너가 시작된 후 체크를 대기하는 시간(초)
- timeoutSeconds: 타임아웃 시간(초)
- periodSeconds: 체크하는 수행 주기(초)
- successThreshold: 실패 후 연이어 체크 성공해야 하는 횟수
- failureThreshold: Pod가 시작되고 검증 실패 시 체크하는 횟수
initialDelaySeconds: 5초
timeoutSeconds: 5초
periodSeconds: 5초
successThreshold: 1초
failureThreshold: 3초로 설정하고 실험을 시작한다.
yaml 값을 입력하면서 알았는데... probe설정에는 exec 즉 실행 관련 명령어와 tcpsocket에 관한 명령 두 개가 존재한다.
그래서 해당 명령을 사용하기 위해 tcpsoket을 정의해주어야 한다.
나는 yaml 설정을 다음과 같이 했다.
apiVersion: v1
kind: Pod
metadata:
  name: counter
  namespace: iskim
spec:
  containers:
  - name: count
    image: busybox
    ports:
    - containerPort: 8080
    readinessProbe:
      tcpSocket:
        port: 8080
      initialDelaySeconds: 5
      timeoutSeconds: 5
      periodSeconds: 5
      successThreshold: 1
      failureThreshold: 3
    args:
    - /bin/sh
    - -c
    - >
      i=0;
      while true;
      do
        echo "$i: $(date)" >> /var/log/1.log;
        echo "$(date) INFO $i" >> /var/log/2.log;
        i=$((i+1));
        sleep 1;
      done
    volumeMounts:
    - name: varlog
      mountPath: /var/log
  - name: count-log-1
    image: busybox
    args: [/bin/sh, -c, 'tail -n+1 -f /var/log/1.log']
    volumeMounts:
    - name: varlog
      mountPath: /var/log
  - name: count-log-2
    image: busybox
    args: [/bin/sh, -c, 'tail -n+1 -f /var/log/2.log']
    volumeMounts:
    - name: varlog
      mountPath: /var/log
  volumes:
  - name: varlog
    emptyDir: {}
3. 실행
kubectl create -f sidecar.yaml
잠깐 시간이 기다리면 컨테이너가 2/3으로 올라온다.

describe를 찍어보면 readiness probe가 failed 했다고 나온다.
Events:
  Type     Reason     Age               From               Message
  ----     ------     ----              ----               -------
  Normal   Scheduled  51s               default-scheduler  Successfully assigned iskim/counter to p-iskim-master
  Normal   Pulling    51s               kubelet            Pulling image "busybox"
  Normal   Pulled     49s               kubelet            Successfully pulled image "busybox" in 2.284094669s
  Normal   Created    48s               kubelet            Created container count
  Normal   Started    48s               kubelet            Started container count
  Normal   Pulling    48s               kubelet            Pulling image "busybox"
  Normal   Created    46s               kubelet            Created container count-log-1
  Normal   Pulled     46s               kubelet            Successfully pulled image "busybox" in 1.909218031s
  Normal   Started    46s               kubelet            Started container count-log-1
  Normal   Pulling    46s               kubelet            Pulling image "busybox"
  Normal   Pulled     44s               kubelet            Successfully pulled image "busybox" in 1.976622521s
  Normal   Created    44s               kubelet            Created container count-log-2
  Normal   Started    44s               kubelet            Started container count-log-2
  Warning  Unhealthy  2s (x9 over 42s)  kubelet            Readiness probe failed: dial tcp 172.32.230.141:8080:
근데 readiness probe 정책상 Restart를 해야 하는데.... 정작 restart 횟수는 0이다. → readiness가 아니고 liveness...ㅠㅠ
root@p-iskim-master ~/side_car # k describe pod counter | grep -i restart
    Restart Count:  0
    Restart Count:  0
    Restart Count:  0
아마 내 생각인데... 사이드카 컨테이너는 로컬 호스트로 묶여있어서 2개가 이미 성공했다고 판단하기 때문에 재시작을 하지 않는 것 같다.
그래서 probe 설정이 의미 없다는 거고... 만약 재시작을 한다면 pod 전체를 재시작해주어야 할 것 같다.
컴퓨터 상에서는 특정 앱이 안 올라가면 특정 앱만 재시작해주면 되지만 이건 조금 다른 개념으로 보인다.
단일 Pod로 수정 후 probe 테스트를 다시 해본다.
apiVersion: v1
kind: Pod
metadata:
  name: counter-single
  namespace: iskim
spec:
  containers:
  - name: count-single
    image: busybox
    ports:
    - containerPort: 8080
    readinessProbe:
      tcpSocket:
        port: 8080
      initialDelaySeconds: 5
      timeoutSeconds: 5
      periodSeconds: 5
      successThreshold: 1
      failureThreshold: 3
    args:
    - /bin/sh
    - -c
    - >
      i=0;
      while true;
      do
        echo "$i: $(date)" >> /var/log/1.log;
        echo "$(date) INFO $i" >> /var/log/2.log;
        i=$((i+1));
        sleep 1;
      done
    volumeMounts:
    - name: varlog
      mountPath: /var/log
  volumes:
  - name: varlog
    emptyDir: {}
흠... 신기하게 단일 컨테이너도 8080에 실패하는데.. 이거 혹시 service를 연결해주어야 하나?...
deployment로 하나 올려서 service을 붙여본다.
4. deployment로 서비스 붙이고 probe 설정
예전에 책에서 실습한 내용을 갖다 쓰자 ㅋㅋ
apiVersion: apps/v1
kind: Deployment
metadata:
  name: hostname-deployment
  namespace: iskim
spec:
  replicas: 3
  selector:
    matchLabels:
      app: webserver
  template:
    metadata:
      name: my-webserver
      labels:
        app: webserver
    spec:
      containers:
      - name: my-webserver
        image: alicek106/rr-test:echo-hostname
        ports:
        - containerPort: 80
        readinessProbe:
          tcpSocket:
            port: 80
          initialDelaySeconds: 5
          timeoutSeconds: 5
          periodSeconds: 5
          successThreshold: 1
          failureThreshold: 3
deployment로 테스트해보니까 service는 굳이 필요 없다.
ContainerPort만 잘 적혀있으면 된다.
일단은 tcpSocket를 8080으로 주었을 때는 다음과 같은 결과가 나온다.
  tcpSocket:
    port: 8080
Pod에서 할 때와 동일하게 나오는데 이걸 edit으로 80으로 고치면 된다.
Events:
  Type     Reason     Age   From               Message
  ----     ------     ----  ----               -------
  Normal   Scheduled  14s   default-scheduler  Successfully assigned iskim/hostname-deployment-66d78b64dc-pvgdt to p-iskim-master
  Normal   Pulled     14s   kubelet            Container image "alicek106/rr-test:echo-hostname" already present on machine
  Normal   Created    13s   kubelet            Created container my-webserver
  Normal   Started    13s   kubelet            Started container my-webserver
  Warning  Unhealthy  5s    kubelet            Readiness probe failed: dial tcp 172.32.230.189:8080: connect: connection refused
80으로 바꾸면 컨테이너가 정상적으로 올라오고.. probe도 정상적으로 통과된다.
  tcpSocket:
    port: 80
Events:
Type Reason Age From Message
---- ------ ---- ---- -------
Normal Scheduled 4m33s default-scheduler Successfully assigned iskim/hostname-deployment-8b494796c-hptt5 to p-iskim-master
Normal Pulled 4m33s kubelet Container image "alicek106/rr-test:echo-hostname" already present on machine
Normal Created 4m33s kubelet Created container my-webserver
Normal Started 4m32s kubelet Started container my-webserver음... 내가 보고 싶은 건 RESTARTS 값이 변하는 건데....ㅠㅠ
→ 아 ㅋㅋ 테스트를 readiness로 하고 있었네...ㅋㅋ liveness로 다시 해본다..
liveness probe가 실패하고.... RESTART 값은!?
Events:
  Type     Reason     Age                From               Message
  ----     ------     ----               ----               -------
  Normal   Scheduled  38s                default-scheduler  Successfully assigned iskim/hostname-deployment-55bf8c67d5-6r8p2 to p-iskim-worker2
  Normal   Pulled     38s                kubelet            Container image "alicek106/rr-test:echo-hostname" already present on machine
  Normal   Created    38s                kubelet            Created container my-webserver
  Normal   Started    37s                kubelet            Started container my-webserver
  Warning  Unhealthy  18s (x3 over 28s)  kubelet            Liveness probe failed: dial tcp 172.32.193.92:8080: connect: connection refused
  Normal   Killing    18s                kubelet            Container my-webserver failed liveness probe, will be restarted
정상적으로 횟수가 올라간다... 휴.. 테스트 성공 그러면 다시 사이드카로 돌아가서 해본다.
Every 2.0s: kubectl get pod -o wide                                                                                   Sun Mar 13 21:14:31 2022

NAME                                   READY   STATUS    RESTARTS   AGE   IP               NODE              NOMINATED NODE   READINESS GATES
hostname-deployment-55bf8c67d5-6r8p2   1/1     Running   1          56s   172.32.193.92    p-iskim-worker2   <none>           <none>
위에 했던 readiness를 liveness로 실행하면 똑같이 되므로 굳이 적진 않겠다.
※ 결과는 컨테이너 전체가 재시작되지 않고, 문제 있는 컨테이너만 재시작된다.
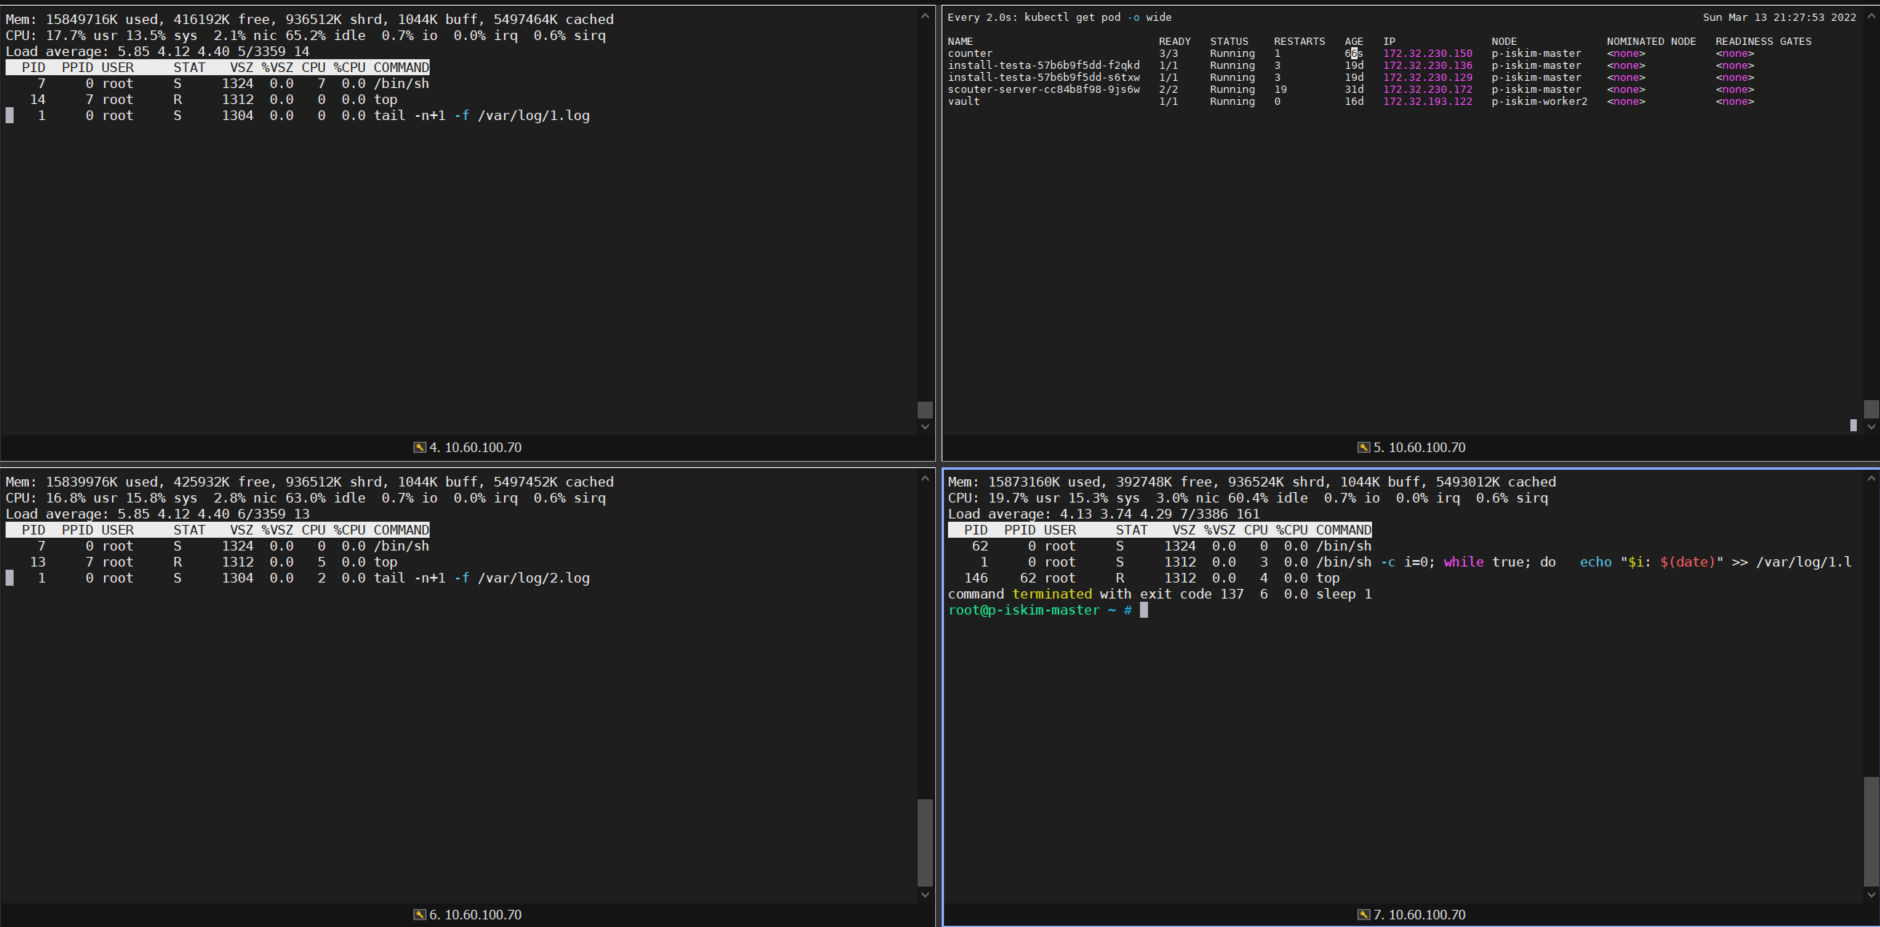
위의 사진은 문제있는 pod에 liveness를 걸어두고, 각 컨테이너에 접속한 사진인데..
count-log-1, count-log-2, count가 존재한다.
근데 liveness가 동작하면서 log-1, log-2번에 접속한 컨테이너는 살아남고, 문제가 있는 count 컨테이너만 재시작되고 restart 값이 올라갔다.
그럼 결과적으로 문제 있는 컨테이너만 재실행이 가능하다는 말이된다.
감사합니다.
'Cloud > k8s' 카테고리의 다른 글
| Calico CNI를 이용하여 Pod 고정 IP 할당하는 방법 (0) | 2022.08.02 |
|---|---|
| kubectl apply, create, patch, replace 비교 (2) | 2022.03.20 |
| kubens을 통한 multi-cluster 컨트롤하기 (0) | 2022.01.17 |
| kubernetes install guide(v1.18.6) (0) | 2021.12.12 |
| k8s 8일차 (0) | 2021.08.19 |

